
By Jamie Lindau, Tracte Buildings
Well, you have finally gotten all your approvals for your self-storage project. It has taken you at least two to three times as long as you thought, and to top it all off, you had to agree to a bunch of additional items the city required that you are still trying to figure out how to pay for.
Now you are finally ready to build. Next, you are either pulling the trigger with hiring a general contractor to build your site or you are planning to be your own general contractor and start building. This article is written assuming that you are going to be your own contractor because it will be the worst-case scenario for you. (Yes, that means it is all up to you to figure out your mistakes.)

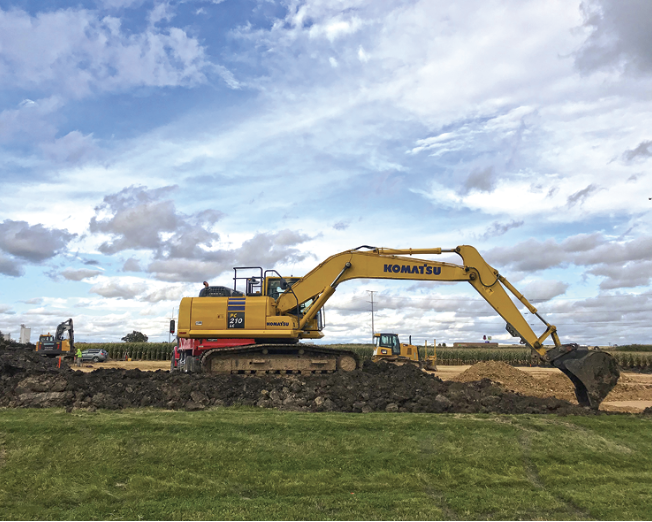
Site Preparation
The single biggest development mistake of building a self-storage is to not have the proper grading in place. This means that you have water properly flowing off your pavement to your new retention pond. I know you have a grading plan in place from a licensed civil engineer, but once you work your site and try to determine final grades (there are always field changes that have to be made) you will then determine if the plan will actually work.
What specifically you are looking for is if you have enough pitch to drain your water correctly. For example, if you are using asphalt you will want to have your water drain at a 1 percent pitch, but if you have a concrete drive you can reduce slope to 1/2 percent. The greater the slope the better it is for drainage. Many people regret not installing underground storm drains including pipes from the gutter spouts. This option costs more but you will always be happy you did it in the long run.
Speaking of grading and dealing with precipitation, a related mistake is to drain water to the north side of the building in any climate with ice and snow in the winter months.
Planning Conduit Runs
Failing to properly plan and install all the underground conduit you will need for your project can be another major mistake. This sounds like a minor item, but it is extremely important.
The first conduit line that will go from your office building to your self-storage buildings will be for power. Normally you will need at least a 1-1/2-inch conduit going to each building so that you can have power for outside lighting. If you are going to have a climate-controlled building, you may require a larger pipe for the extra power needed for HVAC systems.
In case you are phasing your project, and do not know exactly what building you may be doing next you will want to oversize the pipe and make sure the conduit extends beyond the pavement you are doing in the first phase.
The second conduit layout you should be working on is for your camera system. This low-voltage conduit must be separate from the electrical conduit to reduce interference from the higher-voltage power lines.
The last conduit you will need to work on is for the controlled gate access system and keypads. The location of this conduit will be determined by where you are installing your gate system.
Gate Placement
Poor gate placement is another common mistake. The ideal spot for the gate will allow for the customers to be off the road while putting in their gate code. The actual gate should be at least 12 feet in front of the keypad so there is a better chance that your customers will not run into the gate. Customers should be able to access the office (or automated kiosk, if applicable) and should have room to turn around and leave without going through the gate.
I believe whether or not you are planning to put in a gate now or possibly in the future, you should always figure out the exact gate location. The location of the gate may change what type of gate you will need for your project. In many situations, the best location will force you to install a vertical lift gate instead of a sliding gate. Of course, the vertical lift gate costs a lot more than a slider, but it may be the best type for your situation.
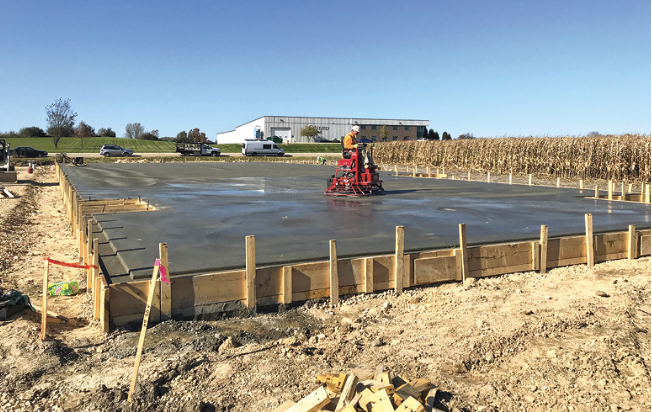
Installing The Foundation
We are now ready to install your foundations. I suggest that you have your site surveyor stake out the building corners to make sure you are setting the building into the correct spot. This costs extra money, but it is invaluable to make sure all the buildings are properly positioned and at the correct floor height.
While you are constructing, you may run over the grading stakes; it costs more money, but have your surveyor come out again — it minimizes the chances for a mistake.
I’m a firm believer to also verify the building foundation dimensions before concrete pouring is started. A typical mistake is that the concrete contractor does not have the correct building width (they took the dimension from the outside of the form, not from the inside where the concrete will stop).
What happens more frequently is, if you have steps in the buildings, these may not be in the right spot or the correct height compared to the final site plan layout.
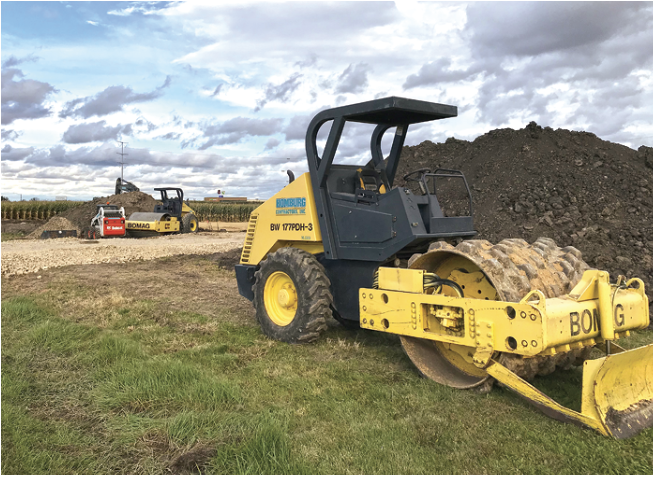
Final Grading And Paving
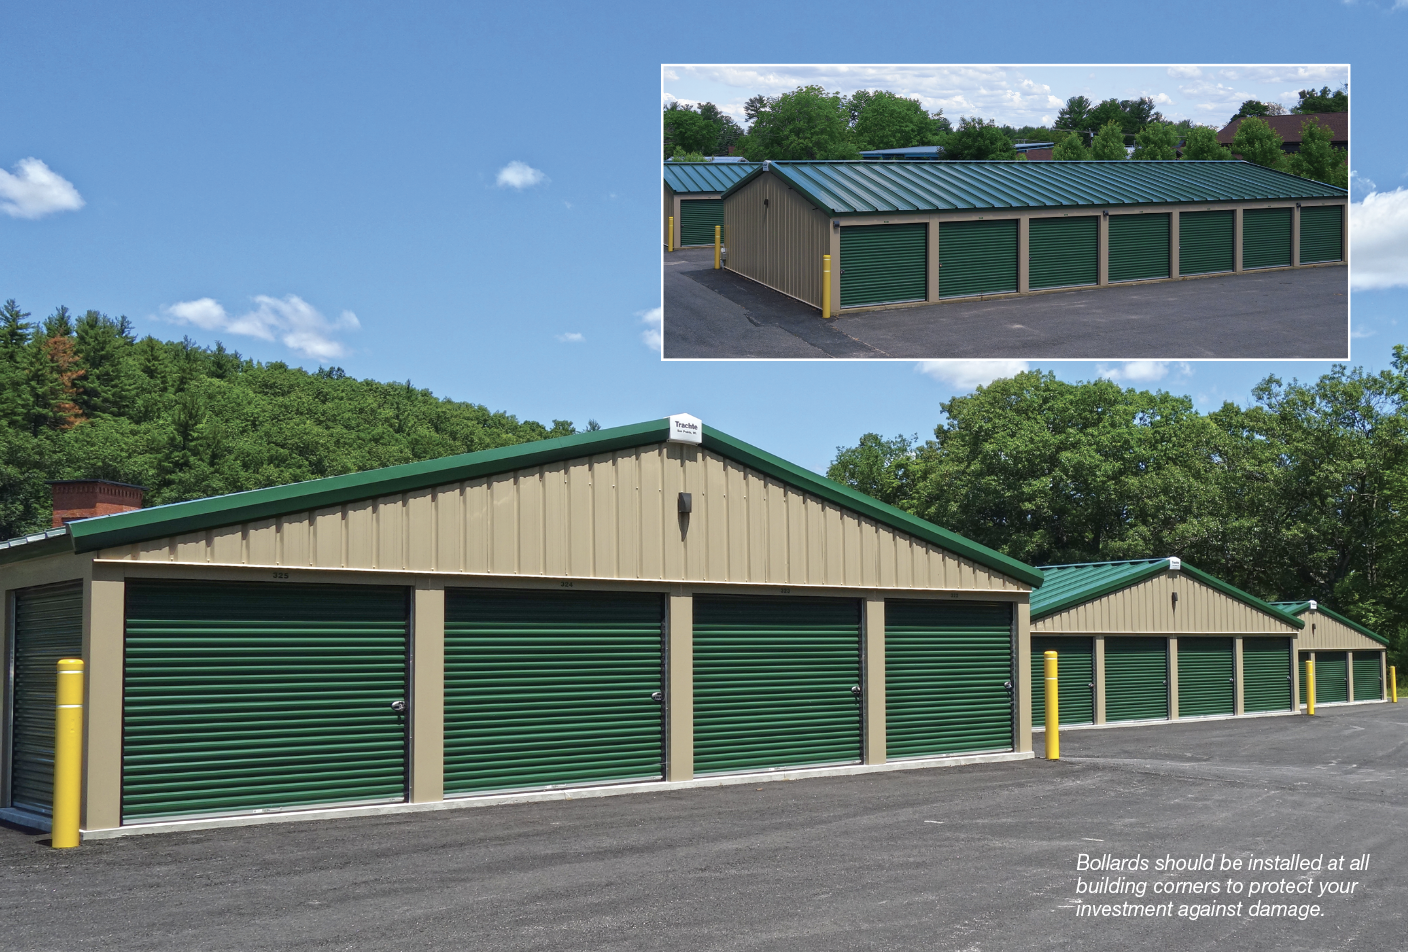
Once your foundations are poured, then you can do final grading and possibly install your binder course of asphalt paving. Many people do this later (once the building is built) but some still pave before the building is installed so that they will not have their asphalt paving contractor hit the building. Whatever the case, you will want to have all bollards installed before paving. ALWAYS install bollards on all four corners of your building, these bollards should be a minimum of 6 inches wide and 3-4 feet into the ground so they are normally a total of 7 feet long when purchased. You will also want to install bollards on all sides of your keypads, and on the corners of your gate so that you will be protecting your investment. I have now started to put bollards at all my recessed openings into hallways. Many people seem to back into these areas, so it is good to protect against them hitting them. If you are building large Boat/RV commercial units then you may want to put in bollards in front of each of the door jambs. This is an expensive proposition, but it will help defend against damage in the future.
Office Space
One of the biggest regrets people have had with their self-storage development is that they wished they would have built a nicer office. I believe it is very important to put all the extra money you have into making your office as beautiful and as spacious as you can. The extra touches in design and finishes always pay off in the long run. Good planning up front is key. If all the parts are detailed then you will just need to hire good finish carpenters to implement the plan. Make sure the office has a unit next to it to store equipment/electric cart/maintenance items. Preferably this area is also heated; it will be helpful in keeping the site clean and in good order.
Final Installation
When the actual building is installed you will want to verify that the building is going up according to plan. Make sure to do a proper walk through with the installer to make sure all the doors are in proper working order, that there are no missing screws in a wall panel, etc. Remember, it is easier to fix any issues up front than find out about them afterwards when you have started to rent a unit.
In your buildings that have hallways, I recommend planning an area that will accommodate the carts needed to move your customers’ possessions to their unit. I have seen many times these carts just left in the corridor and can become an obstacle for the customers. Having an area for them set aside out of the way is a better plan.
Be Ready For Business
Lastly, don’t get so caught up with the physical construction that you miss important property management details. I recommend that people pull a permit for each building separately. The reason for this is that you can get a certificate of occupancy per building. This means when you have one building done you can start renting. In many areas, if you pull only one building permit that means all the buildings must be completed before you can rent one unit. Many customers are so worried about getting the building built they are not actually ready to rent a unit. It is wise to have your website and management software system already in place, for example. Don’t forget to submit your business details to major search engines so customers can find you. Set up your accounting software, before opening, and if possible work to integrate it with your management software. You will need to be set up to take credit cards, and your banking should be ready to go, including taking ACH payments.
You have been working for many months — if not years — getting ready for this point of actually collecting money. It is surprising to see how many people are not prepared for the day they can actually start earning some money. RB